Skip to content

Bake Like a Pro: Top Tips & Irresistible Brownie Recipes

Bake Like a Pro: Top Tips & Irresistible Brownie Recipes

If you’re anything like us, you know that there’s no better treat than a rich, gooey brownie fresh out of the oven. But let’s be real, making the perfect brownie can be a bit of a challenge – and that’s where we come in.

Read on to discover helpful tips and mouth-watering brownie recipes using Tate & Lyle Sugars. So, grab your apron, preheat that oven, and get ready to learn how to make the best brownies you’ve ever eaten!

What’s so good about brownies?

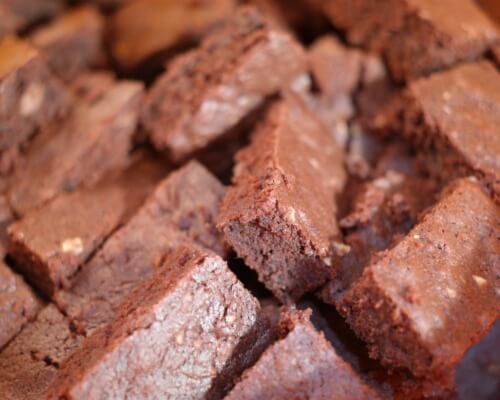
Brownies have a special place in the nation’s hearts (and stomachs). There’s something so satisfying about biting into a rich, fudgy square of chocolatey goodness that’s both comforting and exciting all at the same time. Whether it’s a midday pick-me-up, a dessert to share with friends, or a sweet treat to enjoy with a cuppa, brownies never fail to hit the spot!

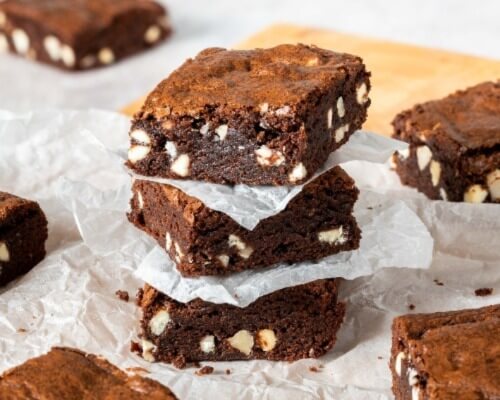
Plus, brownie recipes are incredibly versatile – you can mix in nuts, swirl in caramel, or add a caffeine kick of coffee to create your own ideal flavour combination.

What’s the secret to a good brownie?

Brownies are just flour, chocolate, butter, cocoa powder, eggs and sugar – right? But it’s not quite as simple as chucking everything in a bowl and magically creating brownies. But don’t fret! We’ve got you covered – check out our helpful tips to help you make glorious brownies.

Generally, brown sugar will make your brownies moister and chewier, while white sugar will give them a crisper texture. In addition, brown sugars add a deeper flavour and complexity to the brownies. They contain a higher molasses content and can give the brownies a rich, caramel-like flavour.

Sift the flour and cocoa powder together

Sifting your flour and cocoa powder may seem like a small step, but it can make a big difference in the texture of your brownies. Sifting these ingredients adds air to the brownie batter, which helps your brownies rise and makes it easier for the wet and dry ingredients to come together, creating a smoother, more consistent batter.

Use butter instead of vegetable oil 

Both butter and vegetable oil does a great job of giving you a moist brownie and a mouth-watering texture, but if you’re looking for more flavour – butter is your best bet!

Use baking parchment in your baking tin

There’s nothing worse than spending time and effort making the perfect batch of brownies, only to have them stick to the pan when it’s time to take them out.

By lining your baking tin with baking parchment that covers both the base and sides, you’ll create a non-stick surface that makes it easy to remove your brownies without any damage.

How to bake the brownies

The moment of truth has arrived – it’s time to bake those brownies! But how do you get that perfect texture that’s just right for you? If you prefer brownies with a gooey and soft centre, bake them for the time stated in the recipe and dip a toothpick in the centre of the brownies once they’re cooked. If the toothpick has brownie batter on it, it will need to be baked longer, but if it has a few moist crumbs on the toothpick – it’s ready to come out of the oven.

Whereas if you prefer brownies with a cakey texture, bake the brownies until the toothpick comes out clean or the brownie starts to come away from the sides of the tin.

Don’t overbake your brownies

The last thing you want is dry, crumbly brownies that no one wants to eat! The trick is to take your brownies out of the oven just before they’re fully done. Brownies continue to bake as they cool, so if you wait until they’re completely baked in the oven, you’ll end up with overdone brownies.

Looking for vegan or gluten-free brownies?

It’s super easy to make a standard brownie recipe vegan or gluten-free. To make your brownies vegan, use vegan chocolate and substitute one ripe, mashed banana per egg required in your recipe. To make gluten-free brownies, just use gluten-free flour instead of normal flour – it’s that simple!

Leave your brownies to cool in the tin

Brownies are very delicate when they’re hot and fresh out of the oven, so they’ll break apart when you remove them from the tin. Leave your brownies to cool in the tin before removing them, this allows them to set and become firmer, making it easier to remove them from the tin without any damage.

Make sure brownies are cool before cutting

Allow your brownies to cool completely before you cut them, this will help you get a clean slice with minimal crumbs making a mess in your kitchen!

Get inspired with these incredible brownie recipes

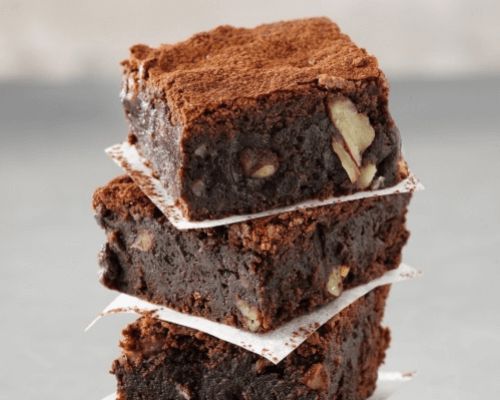
Once you’ve got the basic brownie recipe nailed, the world is your oyster! It’s time to get creative and experiment with different ingredients and flavours to create your ultimate brownie masterpiece – check out these delicious brownie recipes for inspiration:

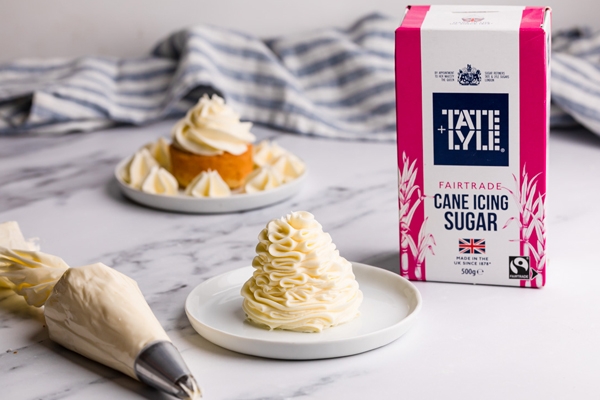
Up your brownie game with Tate & Lyle Sugars

Our range of sugars, sweeteners and syrups are the perfect addition to any brownie recipe. So, what are you waiting for? Explore our range of Tate & Lyle sugars and get ready to create the most delicious and indulgent brownies you’ve ever tasted!

Baked Alaska: A Showstopper Dessert For Any Occasion!

Baked Alaska: A Showstopper Dessert For Any Occasion!

Discover the secrets of crafting the perfect baked Alaska! From its history to a simple recipe, learn how to impress your guests with this show-stopping dessert.

Baked Alaska, the name alone conjures up images of a lavish dessert that’s reserved only for special occasions. But here’s a secret: It’s not actually as complicated as it may seem.

Read on to explore our simple baked Alaska recipe and discover the answers to some commonly asked questions about this timeless treat.

What is baked Alaska?

This is a dessert with a history that spans centuries; a showstopper that’s perfect for any gathering. Its dramatic presentation and exquisite taste are sure to impress your guests!

Baked Alaska is a glorious blend of meringue, ice cream and cake. However, the real charm of this dessert lies in its versatility.

While the classic version typically features vanilla ice cream atop a vanilla sponge cake, the possibilities for creativity are endless. You can let your imagination run wild, experimenting with different flavours to make your own unique baked Alaska.

Why is it called baked Alaska?

Curious about the name? Well, it’s actually a nod to its history. It’s thought that this dessert was created to celebrate America purchasing Alaska from Russia in 1867.

The name reflects the contrast between the toasted meringue and cold ice cream – a culinary metaphor for the chilly Alaskan climate versus the warmer USA.

What’s the difference between bombe Alaska and baked Alaska? 

Both are delicious desserts, but the key difference lies in how they’re served. Bombe Alaska is flambéed, which means it’s covered in rum or brandy and set on fire before serving. This adds a tasty smoky flavour, not to mention a stunning visual effect.

In contrast, baked Alaska is (not surprisingly) baked in the oven until it has a glorious golden-brown colour.

Another distinction is that bombe Alaska is usually served with a sauce, such as a luscious chocolate sauce or velvety crème anglaise, while baked Alaska is usually served by itself.

How does the ice cream not melt in baked Alaska?

Now, I know what you’re thinking; if it’s baked in the oven, how on earth does the ice cream not melt?! Well, believe it or not, there are no magic spells involved. The ice cream actually stays intact thanks to the insulating power of the meringue.

The secret lies in the air – meringue is full of tiny air bubbles, and air happens to be an excellent insulator. This serves as a barrier with prevents the intense heat of the oven from reaching the precious ice cream inside.

However, it’s crucial to note that your baked Alaska should only spend a short amount of time in the oven, just enough to give the meringue a beautiful golden-brown finish.

While the meringue will insulate the ice cream, it’s only a temporary shield. Given enough time in the oven, the ice cream will inevitably start to melt.

Crafting your own baked Alaska masterpiece

With all your burning questions answered, it’s time to get stuck in! We’ve got an easy-to-follow baked Alaska recipe with all the details and ingredients you need, but here’s a sneak peek of the process:

Choosing the ice cream

1. The first step is to choose your ice cream flavour. The possibilities are limited only by your imagination, so feel free to experiment.

For tips on how to make irresistible ice cream, delve into our article: 5 Cheap Ice Cream Recipes to See You Through the Summer. Alternatively, you can explore our collection of straightforward ice cream recipes, including:

2. To prepare the ice cream base, begin by lining a large bowl with a piece of plastic wrap (also known as cling film), allowing the edges to drape over the sides for easy removal later. Then, gently press the softened ice cream into the bowl.

3. Now you’ve added your ice cream to the bowl, press it down firmly to make sure there are no gaps. Then, smooth the top and pop it in the freezer, allowing it to completely solidify.

Baking the cake 

1. Start by greasing a round cake tin with butter and line it with greaseproof paper. This will make it easier to remove and prevent your cake from sticking to the tin.

2. Beat the eggs and the Tate & Lyle Pure Cane Caster Sugar together until it triples in size and is pale and fluffy – this is the secret to creating a delightfully airy cake.

3. Feel free to introduce some flavour variations at this point, like lemon juice and zest, orange juice and zest, or even a dash of vanilla extract.

4. In a separate bowl, combine the flour and salt and carefully fold this into your egg and sugar mixture.

5. Finally, bake your sponge until it turns golden brown and leave to cool completely.

Mastering the meringue

1. To prepare the meringue, beat the egg whites together with some white vinegar until they form soft peaks. Adding something acidic like white vinegar to a meringue will improve its structure, helping to aerate it more quickly and make it more stable.

Remember, separating egg yolks and whites should be handled with care and use a clean bowl to avoid any impurities that could hinder achieving those soft peaks.

2. Next, gradually incorporate Tate & Lyle Pure Cane Caster Sugar until it transforms into glossy, stiff peaks.

Time to assemble!

1. Once your cake has cooled completely, place it on a baking tray lined with greaseproof paper. Then gently remove the ice cream from the bowl and place it on top of the cake.

2. Use a spatula to spread the meringue mixture on the ice cream and cake dome until it’s completely covered – make sure there are no gaps!

3. You have two options for the signature baked Alaska finish:

– Option 1: Put it in a hot oven for around 5 minutes until the meringue is golden brown.

– Option 2: Carefully use a blowtorch (also known as a kitchen torch) to achieve that captivating caramelisation effect.

And voilà! Your baked Alaska masterpiece is now ready to be savoured and enjoyed as a delightful testament to your culinary prowess.

Ready to make your very own baked Alaska?

Congratulations! You’ve now unlocked the secrets to creating a masterpiece that will leave your guests in awe.

But remember, no baked Alaska is complete without the star ingredient: Tate & Lyle Sugars. Their exceptional quality and fine texture are the key to achieving the perfect pud.

Be sure to stock up before you start baking!

Brioche Bread and Butter Pudding: A Twist on the Classic Recipe

Brioche Bread and Butter Pudding: A Twist on the Classic Recipe

Bread and butter pudding can be made with a variety of bread, including white, wholemeal, raisin or cinnamon. But have you ever considered trying it with brioche? This twist on the classic recipe transforms this dessert into a luxurious, indulgent pud that’s perfect for a special occasion or a weekend treat.

In this article, discover how to make brioche bread and butter pudding and learn some great baking tips and tricks to yield an even yummier dessert. Plus, check out our classic bread and butter pudding recipe which features our timeless Tate & Lyle Fairtrade Golden Granulated sugar.

Brioche bread and butter pudding Vs. the classic

Bread and butter pudding – a simple, comforting and classic dessert that’s been around for centuries.

While traditional bread and butter pudding is typically made with white or wholemeal bread, using brioche bread instead is an interesting and delicious twist on the traditional.

Brioche is a rich, buttery and sweet bread that’s often used in French patisseries. It’s made with eggs, butter and sugar, which gives it a soft, tender texture that’s perfect for soaking up any custard or cream on the side!

Unlike other breads, brioche has a lighter and fluffier texture, making it perfect for a dessert like bread and butter pudding. The richness of the brioche combined with the sweet custard creates a decadent and satisfying dessert that’s sure to satisfy your taste buds!

How to make brioche bread and butter pudding 

Ingredients and crockery 

To make this delicious dessert, you’ll need:

1

A brioche loaf (sliced and gently pressed)

2

Milk

3

Cream

4

A vanilla pod

5

Orange zest

6

Unsalted butter

7

3 medium eggs

8

Tate & Lyle Fairtrade Golden Granulated sugar

9

Cream or custard to serve

In terms of crockery, you’ll be needing a small non-stick pan, a jug, a baking dish or roasting tin and a large bowl.

Method

To make a brioche bread and butter pudding, the bread is sliced and then soaked in a delicious custard made from a mixture of eggs, milk, sugar and spices. This is then baked in the oven until the custard has set and the bread is golden brown. If you’re looking to follow a step-by-step recipe, keep reading!

Try our classic bread and butter pudding recipe 

Our traditional bread and butter pudding recipe serves 4 people and takes just 20 minutes to prep and 30 minutes to cook. If you’re feeling a bit more adventurous, however, and you’d like to taste a brioche bread and butter pudding, you can still follow the exact same recipe, you’ll just need to substitute the 8 slices of fruit bread with 8 slices of brioche bread.

Don’t forget the Tate & Lyle sugar!

To follow our famous bread and butter pudding recipe, you’ll need 60g of our Tate & Lyle Fairtrade Golden Granulated Sugar. Plus, check out the rest of our super-duper product range featuring a huge variety of seriously scrumptious syrups, sweeteners and sugars.

Delicious Buttercream Recipe Ideas For Your Next Baking Adventure

Delicious Buttercream Recipe Ideas For Your Next Baking Adventure

Looking to take your baking game to the next level? Look no further than buttercream frosting! This creamy and versatile frosting is the perfect way to add some sweetness to your baked goods, whether you’re frosting a cake, decorating cupcakes, or filling some cookies.

In this article, we’ll explore everything you need to know about buttercream, including what it is, how to make it, and some creative and delicious ways to use it. From frosting a cake to making a buttercream glaze, we’ve got you covered. So, get ready to whip up some magic in the kitchen with these mouth-wateringly delicious buttercream recipe ideas!

What is buttercream exactly? 

Buttercream is the life of any party – it’s that creamy, sugary goodness that makes cakes, cupcakes, and all kinds of baked goods extra special. Basically, it’s the frosting on the cake (pun intended).

It’s made from a mix of butter, powdered sugar, milk or cream, and other tasty ingredients depending on the buttercream recipe you follow.

But the best part about buttercream is how versatile it is. You can make it soft and creamy for spreading, or firm and pipeable for decorating. And you can flavour and colour it in all kinds of ways, so it’s perfect for any occasion.

4 lip-smacking ways to enjoy buttercream 

1

Frosting and filling a cake

Buttercream icing is the perfect choice for frosting and filling cakes. To frost a cake, spread a thick layer of buttercream between each layer and around the sides and top. Chill the cake in the fridge for 30 minutes before adding the final layer of extra frosting. To fill a cake, simply spread a thick layer of buttercream between the layers before stacking them together. It’s a classic and delicious choice that will make your cakes extra special. Looking to try out a delicious dessert that utilises the sweetness of buttercream? Look no further than our delicious carrot cake recipe, featuring a creamy and dreamy buttercream frosting that will take your taste buds to the next level. Give it a try and discover a new favourite dessert!

2

Creating a buttercream glaze

Buttercream glaze is a thin and runny version of traditional buttercream frosting that’s perfect for drizzling over cakes, pastries, and other baked goods. To make it, simply whisk together powdered sugar, butter, and a splash of milk until smooth and creamy. Adding milk to the buttercream makes it more malleable and easier to work with, so you can get the perfect consistency for your glaze. Drizzle or dip your baked goods into the glaze for a delicious finishing touch that will take your desserts to the next level.

3

Making cookie sandwiches

Buttercream frosting makes a perfect filling for cookie sandwiches. To make them, bake your favourite cookies and let them cool completely. Then, spread a layer of buttercream on the bottom of one cookie and place another cookie on top. Repeat until you have as many cookie sandwiches as you want. You can also add toppings like sprinkles or crushed nuts for extra flavour and texture. Try out our popular chocolate ice cream sandwich recipe and substitute the ice cream for buttercream.

4

Pairing it with fruit

Pairing buttercream frosting with fresh fruit is a delicious and easy way to add some variety to your dessert menu. Simply wash and cut your favourite fruits, arrange them on a plate, and spoon a dollop of buttercream frosting on top. For extra sweetness, add chopped nuts or grated coconut. It’s a perfect option for those looking for a lighter and fresher dessert option.

Try our delicious buttercream recipe  

Buttercream recipe FAQs 

Can you freeze buttercream? 

Yes, buttercream frosting can be frozen. Simply transfer it to an airtight container or freezer bag and label it with the date and type of frosting. When you’re ready to use it, let it thaw in the fridge overnight and then give it a good stir or whip it again to restore its smooth texture. It’s worth noting that freezing and thawing may change the texture and consistency of the frosting.

How long does buttercream last in the fridge? 

Leftover buttercream can last in the fridge for up to 2 weeks if stored properly in an airtight container. Keep in mind that the shelf life of buttercream may vary depending on factors like ingredients, preparation, and storage. If the buttercream has an unusual smell, appearance, or taste, it’s best to discard it to be safe.

Easy and Delicious Pastry Recipes for Every Occasion

Easy and Delicious Pastry Recipes for Every Occasion

Are you in the mood for flaky filo, buttery puff, or perhaps a crumbly shortcrust? You’re in for a treat—literally! In this article, explore the different types of pastry, discover some tips for making perfect pastry, and try out some tasty pastry recipes featuring Tate & Lyle Sugars.

The wonderful world of pastry

What makes pastry such a staple in both our bakeries and our hearts? Let’s explore the different types of pastries.

Filo pastry 

pistachio date and custard filo parcels

Delicate and crisp, filo pastry is a true delight! It’s made by stretching dough so thin that you can almost see through it, and then cutting it into sheets.

Once the sheets are layered with a brush of melted butter or oil, you’re set for a flaky masterpiece that offers a satisfying crunch with every bite.

Try your hand at these fabulous filo pastry recipes:

Chocolate filo cigars

These sweet pastries are super simple to make and are ready to devour in just 30 minutes, making them the perfect treat for any occasion!

Plum strudel

Juicy plumbs meet crispy filo pastry in this classic Austrian pudding, a true culinary match made in heaven. Top tip: it tastes even better with a scoop of ice cream.

Easy walnut baklava

Layers of crispy filo, crunchy walnuts and pistachios, and syrupy sweetness make this Middle Eastern classic a showstopper. It’s a labour of love, but oh-so worth it!

Puff pastry

Imagine biting into layer upon layer of buttery pastry – mouth-watering, isn’t it? Puff pastry is made by folding butter and dough together to create layers. Then comes the magic: the water in the pastry creates steam when it’s baked, causing all the layers to puff up into a light, flaky pastry.

Check out our tasty puff pastry recipes:

Peach Danish

Whether they’re for breakfast, brunch or a mouth-watering dessert, these pastries are like sunshine on a plate.

Tarte Tatin

Turn your world upside down with this classic French recipe. Caramelised apples and flaky puff pastry unite to create a dessert that’s as elegant as it is delicious.

Biscoff swirls

Flaky puff pastry and creamy Biscoff spread? Say no more! These delightful spirals are the perfect pick-me-up at any time of day.

Shortcrust pastry 

The unsung hero behind most pies and tarts, shortcrust pastry has a crumbly, melt-in-the-mouth texture that is truly irresistible. Minimal handling helps prevent the butter from melting and maintains its iconic delicate texture.

Explore these scrumptious shortcrust pastry recipes:

Mini pecan pies

With a buttery shortcrust base and gooey, nutty filling, these mini pecan pies offer maximum flavour.

Mini apple pies

Think of these pies as autumn on a plate – sweet, spiced apples enveloped in crumbly shortcrust pastry. What’s not to love?

Bakewell tart

Ah, the quintessential British dessert! A luscious layer of jam, topped with almond frangipane and surrounded by shortcrust pastry—absolute perfection.

Choux pastry

Churros with Cinnamon Sugar

Light as air and puffed to perfection, choux pastry is the cornerstone of most French desserts. This pastry is a little different to the others, as it’s cooked on the hob to create a thick paste which can then be piped through a piping bag to create different shapes. Have a go at these simple choux pastry recipes:

Gateau St Honoré cake pops

This dessert is as fun to make as it is to eat! Little balls of choux meet puff pastry and come together with a luscious cream filling to create a treat that’s simply divine.

Chocolate éclairs

It doesn’t get more classic than this. Crispy choux pastry filled with scrumptious cream and topped with glossy chocolate – simply irresistible!

Churros with cinnamon sugar

Transport your taste buds to Spain with these mouth-watering churros. A sprinkle of cinnamon sugar completes this crispy, airy delight.

7 golden rules for making perfect pastry

Feeling a little nervous about your upcoming baking project? Fear not, for these tried-and-tested tips will help to settle those pastry woes.

1

Keep it cool

Try to keep your ingredients and tools cold. This prevents the butter from melting too quickly, helping to preserve the texture of your pastry.

2

Master the art of restraint

It’s tempting to continuously knead and work the dough, but with pastry, less is more. Overworking your pastry will activate too much gluten, leaving you with a tough, chewy texture.

3

Be gentle with your dough

Avoid roughly pulling or stretching your dough, as this can result in a hard and compact texture. Instead, lightly pat your dough into shape.

4

Remember to refrigerate your dough first

Before rolling out your dough, wrap it in plastic wrap and put it in the fridge for 30 minutes. This will make your dough easier to roll and cut while also preventing it from sticking to your work surface. Plus, it keeps the butter in your pastry from melting.

5

Avoid a sticky situation

Add a light sprinkling of flour onto your rolling pin and work surface to prevent your dough from sticking. However, be careful not to add too much flour, because this can make the pastry dry and tough.

6

Roll with it

Always start rolling from the centre of your pastry outwards. This helps keep your pastry a level thickness so that it bakes evenly.

7

Preheat your oven

You should put your pastry in a preheated oven. This makes sure it starts baking straight away, helping it cook evenly.

Ready to pull off the perfect pastry?

Feeling inspired? There’s no better time to dive into the scrumptious world of pastries! And remember, every great pastry recipe starts with great ingredients. Explore our range of Tate & Lyle Sugars and create some mouth-watering bakes!

How to Make a Basic Yet Brilliant Sponge Cake: Recipes, Tips & Tricks

How to Make a Basic Yet Brilliant Sponge Cake: Recipes, Tips & Tricks

A classic sponge cake is a delightful summertime dessert that never fails to impress with its lightness, refreshing flavours, and versatility.

Whether you’re a novice baker or a seasoned expert, mastering the art of creating a perfect sponge cake is a rewarding experience that will absolutely elevate your baking repertoire.

From choosing the right ingredients and mastering the mixing technique to selecting the perfect sponge cake recipe to follow, we’ll share essential tips and tricks to make sure your sponge cakes turn out beautifully every time.

So, grab your apron, preheat the oven, and let’s dive into the wonderful world of sponge cake baking.

5 tips and tricks for perfecting your sponge cake 

1

Proper pan preparation

Make sure your cake tins are properly greased and lined with parchment paper. This keeps the cake from sticking to the pan, allowing for easy release and preserving its shape.

2

Sifting for a smooth texture

Sift your dry ingredients, such as flour and baking powder, before incorporating them into the batter. This step removes lumps and ensures a smooth, even texture in your cake.

3

Precision in timing

Be vigilant with the baking time, as over- or under-baking can impact the texture of your sponge cake. Keep a close eye on it and perform the toothpick test to determine when it’s perfectly baked.

4

Moisture is key

Maintain the moisture of your sponge cake by adding a simple syrup or fruit juice soak to the layers before applying fillings. This ensures a moist and tender texture throughout.

5

Remember the Tate & Lyle sugar!

One essential ingredient that should not be overlooked is Tate & Lyle sugar. Our Fairtrade Pure Cane Caster Sugar and Fairtrade Cane Icing Sugar add a touch of sweetness and quality that enhance the taste and texture of your sponge cakes.

3 common sponge cake baking mistakes to avoid 

1

Skipping the preheating

Ensure your oven is preheated to the correct temperature before placing the cake batter inside. Skipping this step can result in uneven baking and an undercooked or sunken sponge cake.

2

Overmixing the batter

Avoid overmixing the batter as it can lead to a dense and heavy sponge cake. Mix until just combined to maintain a light and fluffy texture.

3

Opening the oven too soon

Resist the temptation to open the oven door too early during baking. Sudden temperature changes can cause the cake to collapse or sink. Wait until the cake is close to being fully baked before checking for doneness.

How to serve and store your sponge cake 

Serving your sponge cake

When it comes to serving, there are numerous delicious options to enhance your sponge cake. You can pair it with dollops of fresh whipped cream or spread a luscious layer of lemon curd or strawberry jam between the cake layers for added flavour.

Just make sure your cake has completely cooled on a wire rack before adding any fillings or decorations to prevent them from melting and causing the cake to become soggy.

Storing your sponge cake

When it comes to storing your sponge cake, it’s important to keep it in a cool, dry place, preferably in an airtight container or wrapped tightly in plastic wrap. This will help preserve its moisture and prevent it from drying out.

If you have any leftover cake, be sure to remove any decorative elements such as fresh fruits or whipped cream before storing, as these may not hold up well over time. Properly storing the cake in appropriate-sized cake tins can also help maintain its shape and keep it from getting squished or damaged.

Which sponge cake recipe will you try first? 

Victoria sponge cake

Discover the enduring popularity of our Victoria sponge cake recipe, which is one of the most beloved and iconic sponge cake recipes in British culinary history. Named after Queen Victoria, this classic cake features layers filled with jam and whipped cream, creating a delectable combination that has delighted taste buds for generations.

Plum jam sponge cake

Experience a culinary delight with our sponge cake featuring plum jam and edible flowers. Crafted with love, this easy-to-make dessert blends the sweetness of plum jam with the delicate charm of edible flowers.

Raspberry & almond sponge cake

Indulge in the exquisite flavours of our raspberry and almond sponge cake, a delightful and easy-to-make dessert that will captivate your taste buds.

Lemon & elderflower sponge cake

Delight in the harmonious blend of zesty lemon and delicate elderflower with this sponge cake recipe. Baked to perfection, this delectable dessert offers a variety of tantalizing toppings, including elderflower Swiss meringue buttercream, raspberry meringue kisses, lemon sugar syrup, raspberry coulis, and candied lemon zest.

From Orchard To Oven: Apple Tart Recipes, Baking Tips & Pointers

Apple Tart Recipes, Baking Tips & Pointers

In this article, explore the delicious world of apple tarts, and discover valuable baking tips and pointers along the way. Whether you’re a seasoned baker or just starting out, we have two delectable apple tart recipes to satisfy your cravings, and among them is our special gem—the English Apple Tart recipe.

The a-peel-ing origins of the apple tart 

It’s thought that the first recorded apple tart recipe featured in a French cookbook in the late 14th century. The apple tart, or “tarte aux pommes” as it is known in French, captivated the palates of French nobility with its harmonious blend of buttery pastry, thinly sliced apples, and delicate spices.

Since then, this delicious creation has transcended borders and captured the hearts of baking enthusiasts and dessert lovers worldwide. Its irresistible combination of sweet and tangy flavours, coupled with its versatility, has firmly established the apple tart as a beloved culinary treasure across the globe.

Today, apple tarts continue to be adored and cherished, bringing joy to countless homes and cafes alike. Whether enjoyed warm with a scoop of vanilla ice cream or savoured alongside a comforting cup of tea, these timeless treats never fail to evoke a sense of nostalgia and delight.

Essential ingredients in an apple tart 

The essential ingredients in an apple tart include:

1

Fresh, crisp apples

2

A buttery pastry crust

3

Cinnamon or nutmeg

4

Lemon zest

5

A touch of butter

6

Flour

And don’t forget the sweetest ingredient…  

For that perfect touch of sweetness in your apple tart, look no further than Tate & Lyle Caster Sugar or Tate & Lyle Granulated Sugar. Known for their superior quality and fine texture, Tate & Lyle sugars dissolve easily, ensuring a smooth and evenly sweetened filling.

The delicate caramel notes of caster sugar or the larger granules of granulated sugar add depth and complexity to the flavour profile of your tart, enhancing the natural sweetness of the apples.

Explore our range of Tate & Lyle sugars and syrups and be sure to stock up before getting started.

Common apple tart baking mistakes to avoid

1

Overloading the filling

Be mindful not to overstuff your tart with apples, as this can lead to an uneven bake, a soggy crust, and compromised texture.

2

Choosing bad apples

Choosing the right type of apple is crucial for a successful apple tart. Avoid using overly soft or mealy apples, as they can turn mushy during baking. Opt for firm and crisp apples that hold their shape and provide a pleasant texture in your finished tart.

3

Neglecting the seasoning

Neglecting to season the filling can result in a bland or less flavourful outcome. Enhance the flavour of your apple tart by adding spices like cinnamon or nutmeg, and a hint of lemon zest.

Try these handy apple tart baking tips 

1

Rub the butter into the flour

To achieve the perfect crumbly texture, cut cold butter into small pieces then use your fingertips or a pastry cutter to rub the butter into the flour until the mixture resembles coarse crumbs.

2

Brush the apples

To enhance the flavour and appearance of your apple tart, brush the apples with a glaze made from melted butter, sugar, cinnamon, and a hint of lemon juice before baking.

3

Protect the crust edges

To prevent excessive browning or burning of the crust edges, cover them with aluminium foil or a pie crust shield during baking. This simple step ensures that the crust cooks evenly.

Indulge in delicious desserts with these apple tart recipes 

English apple tart recipe 

Indulge in the timeless elegance of classic English apple tarts, a delightful creation that pays homage to tradition. With just 50 minutes of prep time and 55 minutes of baking, this apple tart recipe encapsulates the essence of simplicity and sophistication.

Our simple and sweet apple pie recipe 

Enjoy the ultimate dessert experience with our sweet apple pie, a delightful alternative to an apple tart. With just 45 minutes of prep time and 45 minutes of baking, this pie embodies homemade perfection, with its tender apples perfectly spiced, and enveloped in a flaky, buttery crust.

Raspberry Cake: A Summer Delight That’s Impossible To Resist

Raspberry Cake: A Summer Delight That’s Impossible To Resist

Get ready to dive into the enchanting world of raspberry cake – a treat that effortlessly balances the sweetness of raspberries with the light and fluffy texture of a cake. In this article, discover mouth-watering raspberry cake recipes, like our simple raspberry and almond cake, and why they’re wonderful alternatives to classic choices like chocolate cake and Victoria sponge.

What makes a raspberry cake so special?

Raspberry cake isn’t just a dessert; it’s a versatile treat that suits every occasion, its sweet and tangy flavours make it an instant crowd-pleaser!

Raspberries are a seasonal fruit and incorporating them into a cake infuses a refreshing fruity twist that perfectly suits a summer vibe. They bring in the right balance of moisture and flavour, keeping the cake light without being overly dense.

The visual appeal of these cakes is undeniable, thanks to the vibrant pops of colour raspberries add to your bakes. You could even go one step further by adding a raspberry glaze or frosting to your creation to add an extra layer of deliciousness.

Our delicious raspberry cake recipes

Whether you’re using pureed, fresh, or frozen raspberries, the possibilities are endless! And we’ve got plenty of recipes, featuring our famous Tate & Lyle Sugars, that will help you create irresistible cakes.

Simple raspberry and almond cake recipe

With just four straightforward steps, this cake is a breeze to make, requiring only 10 minutes of your time. Its simplicity is its charm, making it the ideal choice for a spontaneous dessert.

Raspberry and almond sponge cake recipe

Treat yourself to a slice of sheer delight with our Raspberry and Almond Sponge Cake using Tate & Lyle Sugars. This exquisite creation combines the delicate richness of almonds with the tangy burst of fresh raspberries. The result? A light, fluffy, and utterly flavourful sponge that’s as perfect for summer desserts as it is for elegant tea parties.

Raspberry Swiss roll  

Elevate your dessert game with the Raspberry Swiss Roll – a mouth-watering creation that’s a feast for the eyes and taste buds. Crafted from a light sponge cake, it’s filled with the sweet allure of raspberry jam, fresh raspberries, and luscious cream.

Top tip – leave the cake to cool completely before rolling!

Hidden raspberry cupcakes recipe

Calling all chocolate lovers! These chocolate cupcakes hold a delightful raspberry surprise within. A sweet twist that’s perfect for treating yourself or sharing with friends.

Raspberry cheesecake recipe 

Time to switch things up! Our raspberry cheesecake recipe offers a subtle departure from your standard raspberry cake. It’s a creamy, dreamy delight featuring the goodness of fresh raspberries. Perfect for those special moments or simply a relaxing weekend treat.

Elevate your cakes with Tate & Lyle Sugars

Whether it’s a sunny picnic or a starlit celebration, raspberry cake promises a delightful experience that’s as light and sweet as a summer breeze. But the secret to a perfect cake is Tate & Lyle Sugars.

Don’t wait – grab some Tate & Lyle Sugars before you start baking!

Summer Bliss: Dive Into Our Favourite Sponge Cake Recipes

Summer Bliss: Dive Into Our Favourite Sponge Cake Recipes

The magic of sponge cakes 

Sponge cakes are light and fluffy cakes crafted from a delicate balance of eggs, flour, baking powder, butter and sugar. This cake is a versatile treat that can be easily adapted into exquisite desserts with a variety of flavours.

Crafting your own sponge cake masterpiece is easier than you think. Start by beating butter and Tate & Lyle’s Pure Cane Caster sugar together until pale and fluffy then gradually add in beaten eggs, whisking thoroughly after each addition. Then simply fold sifted flour and baking powder into your mixture with a metal spoon until fully combined.

This concoction forms the basis of all sponge cake recipes and gives you the perfect canvas for your culinary creativity!

Why sponge cakes are great for the summer 

When the sun is shining and the temperatures rise, the last thing you need is a heavy and dense cake. That’s where the magic of a light and airy sponge cake comes in. Their delightful fluffiness makes them a refreshing treat on scorching summer days.

Plus, summer gifts us with an array of seasonal fruits bursting with flavour. Infusing these fruits into your cake not only elevates its taste, but also captures the very essence of the season, making every bite a tasty celebration of summer.

The beauty of these cakes lies in their versatility. With a plethora of recipes tailored to various skill levels and personal preferences, you’re free to let your creativity soar. Whether you’re a beginner or a seasoned baker, the canvas is yours to paint. Experiment with flavours, frostings, and toppings to add individuality to your creations.

Our favourite summer sponge recipes 

Explore this collection of mouth-watering summer sponge cake recipes.

Victoria sponge cake

A British classic and a cult favourite, the Victoria sponge cake consists of two vanilla sponges filled with a luscious filling of strawberry jam and whipped cream. It’s the quintessential tea-time treat that never goes out of style!

Mini Victoria sponge cakes

A twist on the British classic, each mini Victoria sponge cake encapsulates the essence of the full-sized treat – making it perfect for parties or afternoon teas.

Sponge Cake with plum jam and edible flowers

Elevate any occasion with the regal charm of plum jam and edible flowers. The delicate sweetness of the sponge harmonises with the flavours of the plumb jam, while the edible flowers not only add a visual spectacle but also an enchanting floral note.

Lemon sponge filled with elderflower

Witness a true showstopper with a zesty lemon sponge, raspberry meringue kisses, raspberry coulis, and a silky elderflower Swiss meringue buttercream.

Fruit and butter sponge

A speedy dessert that’s perfect for dinner parties. The lush, fruity interior contrasts beautifully with the light and buttery sponge, creating a harmonious symphony of flavours.

Summer berry cake with crystallised rose petals

An incredible sight of summer berries and crystallised rose petals, this harmonious blend of flavours creates a cake that’s as much a feast for the eyes as it is for the palette.

Pimms Layer Cake 

Nothing encapsulates a good ol’ British summer like a refreshing glass of Pimms! This cake embodies the spirit of a sunny garden party with its blend of fruity Pimms and soft sponge cake.

Escape to the tropics with these glorious cakes

When the weather’s gloomy, transport yourself to a tropical paradise with these sensational cakes.

Tequila lime margarita cake

An iconic cocktail transformed into a cake. Indulge in the zesty kick of lime and twist of tequila; it’s a party in every slice!

Coconut-lime cake with mango and Passion fruit jam

Tropical dreams come alive with the gorgeous flavours of coconut, lime, mango and passion fruit – this cake will transport you to sun-kissed beaches and swaying palm trees.

Sponge cakes are so much better with Tate & Lyle Sugars

Transform your summer cakes into something truly extraordinary with the magic of Tate & Lyle Sugars.

Tate & Lyle Pure Cane Caster Sugar dissolves quickly and helps to create a light and fluffy texture for your sponge cake, while Tate & Lyle Fairtrade Golden Caster Sugar introduces delicate hints of honey. Delve into our selection of sugars and syrups and embark on your captivating baking adventure!

The Ultimate Blackberry Jam Handbook: Tips, Tricks & Recipes for a Perfect Preserve

The Ultimate Blackberry Jam Handbook: Tips, Tricks & Recipes for a Perfect Preserve

Say goodbye to store-bought preserves and get ready to embark on a jam-packed journey into the world of blackberry goodness!

In this article, discover top tips and tricks for creating the most delicious homemade blackberry jam imaginable. We’ve even sweetened the deal by including a collection of mouth-watering recipes so you can put your newfound skills to the test and delight your taste buds.

The irresistible allure of blackberry jam

Blackberry jam is a delightful culinary creation, cherished for its rich, sweet-tart flavour and deep, jewel-toned hue.

Its versatility makes it a kitchen superstar—spread it on warm toast, swirl it into yoghurt, or use it as a delectable filling for pastries and cakes.

How to make blackberry jam in four simple steps

1

Prepare your ingredients

Start by gathering fresh blackberries (approximately 1kg), Tate & Lyle Jam Sugar, and lemon juice. Tate & Lyle Jam Sugar is specially formulated with added pectin to help your jam to set perfectly. Also, make sure you have clean and sterilised jars and lids at the ready for the canning stage. Top tip: For the best-tasting blackberry jam, be sure to choose plump, ripe blackberries that have a deep, uniform colour.

2

Cook your blackberries

In a large saucepan, combine the blackberries and sugar over low heat. Stir until the sugar dissolves and the berries release their juices. Then add a splash of lemon juice for a zesty twist. Top tip: When adding sugar to the blackberries, sprinkle it evenly across the surface to help it dissolve better.

3

Simmer to perfection

Turn up the heat to medium and let the mixture come to a gentle boil. Keep it simmering, give it a good stir every now and then, and scoop off any foam that pops up. Keep going until your jam thickens up just the way you like it. Top tip: Use a wide saucepan to help your jam cook evenly and reduce the chance of it boiling over as it thickens.

4

Can and enjoy!

Gently pour the hot jam into sterilised jars, leaving a bit of room at the top. Pop the lids on, and if you want to keep your jam for a while, you can use a water bath canner. This means placing your jars in a large pot of boiling water for a little while to create a tight seal, so your jam stays fresh for longer. Top tip: For the best results, allow your freshly poured jam to cool for a few minutes before sealing the jars and starting the water bath canner process.

Blissful blackberry jam recipes for you to try

Now that you know the basics of making blackberry jam, try out these related recipes to perfect the craft and make the most delicious blackberry-based desserts.

Blackberry loaf

Transfer your blackberry jam skills into a delightful blackberry and lemon loaf – a light and airy sponge that’s bursting with berries and crowned with a vibrant blackberry glaze.

Prep time: 15 minutes

Bake time: 1 hour

Mini blackberry and apple crumbles 

Experience a contemporary take on a classic dessert with our Mini Blackberry and Apple Crumbles. These delectable treats offer the ultimate comfort food experience, blending the nostalgic flavours of blackberries and apples with a tasty modern twist!

Prep time: 15 minutes

Bake time: 20-25 minutes

Blackberry coffee crumble muffins 

This delightful dessert combines the rich flavours of coffee and blackberries. Featuring a moist, cinnamon-infused base, complemented by bursts of fruity blackberry goodness and topped with a coffee-infused crumble, they’re the perfect autumnal treat.

Prep time: 10 minutes

Bake time: 17 minutes

Packed with the juiciness of blackberries and a zesty citrus punch, this blackberry sorbet recipe yields a vibrant and refreshing treat that serves as a delightful, palette-cleansing interlude for your taste buds.

Prep time: 15 minutes

Freeze time: 8-12 hours

Don’t forget the sweetest ingredients… 

When it comes to perfecting your blackberry-based desserts, our specialised range of sugars and sweeteners add that extra touch of magic.

Our Jam Sugar and Preserving Sugar are your go-to companions for crafting exquisite jams, ensuring the ideal consistency and preserving the fruit’s natural flavours. For baking indulgent cakes and pastries, Tate & Lyle Caster Sugar is a must, giving your treats a delicate crumb and a perfect rise. If you’re dreaming of silky-smooth blackberry sorbets or ice creams, our Fine Cane Sugar dissolves effortlessly, infusing your frozen delights with sweetness.

So, whether you’re making jam, baking, or freezing, let our sugars elevate your culinary creations to new heights!

What Makes a Good Chocolate Brownie Recipe?

What Makes a Good Chocolate Brownie Recipe?

We all love these sweet, gooey treats, but a great chocolate brownie recipe can make all the difference. To get them soft and moist on the inside and slightly crispy on top, there needs to be a perfect balance of richness, texture, and flavour. Also, the chocolate flavour itself should be intense and powerful, but not overwhelming.

Sounds a bit difficult, right? Well, with the right recipe, you can make delicious homemade brownies with simple and easily available ingredients. What’s more, you’ll have the option to add your own additional flavourings to bake your brownies just how you like them.

Our favourite chocolate brownie recipes

Whether you like a classic chocolate brownie or want to experiment with something a bit different, we’ve got a range of recipes to choose from. So, pick up a spatula and ready your whisk as we run you through some of our favourite chocolate brownie recipes.

Classic Cane Sugar Brownies

Our Classic Cane Sugar Brownies are ideal for anyone who’s after the quintessential chocolatey treat. This chocolate brownie recipe is an absolute classic. Easy to follow and delivering consistently indulgent results, this is our brownie recipe of choice for any budding baker. Feel free to sprinkle on some chocolate chips or dust with cocoa powder for a final finishing touch.

White Chocolate Blondies

While both blondies and brownies have chewy textures, blondies have a softer, lighter taste than brownies. This is because their recipes differ slightly. So, for these delightful White Chocolate Blondies, you’ll need to use vanilla extract and Tate & Lyle Soft Light Brown Sugar to achieve the gooey consistency you’re after. Loaded with chunks of white chocolate and served best with a caramel drizzle, this recipe puts a delightful twist on the classic brownie.

Chocolate Mocha Brownies

Chocolate and coffee truly are a match made in heaven. And what better way to combine these two decadent flavours than in the form of a brownie? Our Chocolate Mocha Brownies provide the perfect combination of flavour and texture for cocoa and coffee lovers alike. Paired with ice cream or an after-dinner coffee, these delicious dark chocolate brownies are one of our all-time favourites.

Gooey Sea Salted Caramel Brownies

We all know brownies should be sweet, so adding salt to them doesn’t seem quite right. However, salt is a flavour enhancer. By adding salt to your brownies, you’re actually making the chocolate taste sweeter, and these Gooey Sea Salted Caramel Brownies are no exception! This quick and easy chocolate brownie recipe will result in delicious brownies that are packed full of flavour and topped with a decadent caramel topping.

Tate & Lyle Brondies: Duo Dark & White Chocolate Brownies

Finally, our list wouldn’t be complete without something really indulgent for those of you who simply can’t get enough chocolate. These Dark and White Brownies that we like to call ‘Brondies’ bring white and dark chocolate together to mouth-watering effect. These treats are perfect for sharing with friends and family and have a combined cooking and preparation time of just 40 minutes! With a soft, chewy centre and a classic crackly top, you really can’t go wrong with these delicious brownies.

Ready to earn some brownie points?

Now that we’ve run you through some of our absolute favourite chocolate brownie recipes, you should be ready to have a go yourself. Say goodbye to the boxed brownie mix and treat your friends and family to some mouth-watering homemade brownies.

In addition to the recipes listed here, we have plenty more available for all the brownie enthusiasts out there. Feel free to look through all of our brownie and biscuit recipes and check out our range of products that are perfect for baking the perfect brownies.

Your Ultimate Guide to Chocolate Brownie Cakes

Your Ultimate Guide to Chocolate Brownie Cakes

If you’ve ever found yourself torn between the classic fudgy brownie and the indulgent allure of a brownie cake, this guide is here to unravel the delicious distinction. We’ll also unveil some essential ingredients—including our high-quality Tate & Lyle sugars and syrups in our well-loved range—that will elevate your brownie cakes to brand new heights of decadence.

Plus, learn how to add a delightful twist with mouth-watering toppings, from the refreshing burst of summer fruits to the creamy perfection of buttercream frosting and the tantalising touch of flaky salt, we’ve got you covered.

Get ready to unleash your inner baker and learn how to craft your very own chocolate brownie cake masterpiece this summer. Let’s dive in and indulge!

Brownie vs. Brownie Cake: Unravelling the Delicious Distinction 

In the battle of the bakes, the age-old question arises: what sets a brownie apart from a brownie cake?

While brownies tend to be dense, fudgy, and delightfully rich, brownie cakes bring an element of lightness and fluffiness to the table. The texture of a brownie cake falls somewhere between a traditional brownie and a moist, tender cake, offering the best of both worlds.

Essential ingredients for irresistible chocolate brownie cakes

When it comes to crafting irresistible chocolate brownie cakes, the key lies in selecting the finest ingredients. Each component plays a crucial role in achieving that perfect balance of flavours and textures.

Let’s explore the essential ingredients that will make your brownie cakes truly unforgettable.

1

High-quality chocolate

The star of the show, a rich and high-quality chocolate is the foundation of a decadent brownie cake. Opt for semi-sweet or dark chocolate with at least 60% cocoa content for a deep, intense flavour.

2

Tate and Lyle Sugars

To achieve the ideal sweetness and moisture in your brownie cake, turn to our exceptional range of sugars. Our premium cane sugars, such as Golden Caster Sugar or Demerara Sugar, add a distinctive depth of flavour and a delightful caramel note that will elevate your brownie cake to new heights.

3

Unsalted butter

Butter brings richness and a buttery flavour to your brownie cake. Choose unsalted butter to have better control over the overall saltiness of your creation.

4

Fresh eggs

Eggs provide structure and moisture to the brownie cake. Use large eggs at room temperature for optimal incorporation into the batter.

5

All-purpose flour

For a tender and slightly cake-like texture, all-purpose flour is the go-to choice. Its moderate protein content helps achieve the desired balance between tenderness and structure.

6

Cocoa powder

To intensify the chocolate flavour and achieve a beautiful dark colour, add unsweetened cocoa powder to the batter. Look for high-quality cocoa powder for the best results.

Add a twist to your brownie cake with these delicious toppings  

Summer fruits

Take your brownie cake to new heights by incorporating the delightful flavours of summer fruits. From juicy strawberries to succulent peaches and tangy raspberries, these vibrant gems add a burst of freshness to your dessert.

Slice them, dice them, or arrange them artistically on top of your brownie cake to create a visually stunning masterpiece. Each bite will be a delightful combination of rich chocolate and the bright, natural sweetness of seasonal fruits.

Buttercream frosting

Indulge in the velvety decadence of buttercream frosting to take your brownie cake to the next level of scrumptiousness. Silky and smooth, buttercream frosting adds a luscious layer of creamy sweetness to every bite.

Whether you prefer classic vanilla, rich chocolate, or playful flavours like raspberry or salted caramel, buttercream frosting provides the perfect canvas to unleash your creativity. If you’re not sure how to make buttercream, we’ve made a handy buttercream recipe to help you whip up this tasty frosting.

Flaky salt

Embrace the tantalizing contrast of flavours by sprinkling a touch of flaky salt on your brownie cake. The delicate, crystalline flakes of salt add a surprising burst of savoury goodness that beautifully complements the rich sweetness of the chocolate. As you take a bite, the combination of the gooey, fudgy brownie and the subtle saltiness creates a harmonious balance that will awaken your taste buds.

Sea salt flakes also appear in our popular gooey caramel brownies recipe – the perfect brownie recipe to make for your next bake!

Bake your very own chocolate brownie cake this summer 

Indulge in the joy of baking this summer by creating a chocolate brownie cake that will be loved and shared by friends and family. Picture the anticipation as the irresistible aroma fills the air, drawing everyone together.

With a recipe tailored for a larger cake, ensure there’s plenty for everyone to enjoy. Decorate it creatively with toppings like velvety buttercream frosting, vibrant summer fruits, or a sprinkle of flaky salt.

With its delectable taste, inviting aroma, and the shared enjoyment it brings, it’s the perfect treat for creating memorable moments. Bake, share, and relish the bliss of a homemade brownie cake that will make this summer truly special.