Prep
10 minsBake
20-25 minsServes
4x 380g jarsDifficulty
Medium
About
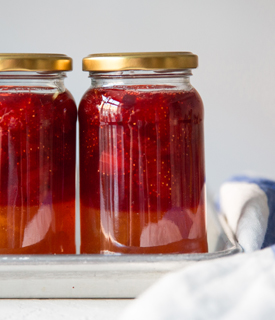
A traditional jam with a twist; it's like happiness in a jar!
Watch video instructions or scroll for step-by-step
To start the recipe, it is best to have all ingredients for both jams prepped and ready, so that once the first jam is made you can immediately start the second, so weigh everything, except for the amaretto, for each jam in separate large pans and set aside about 30 minutes to whip up this recipe.
Once you’re ready it is time for a basic but incredibly important step, sterilising the jars. Wash the jars and lids with hot soapy water then place onto a roasting tray and place into an oven heated to 180C for about 15 mins. This means the jams you are lovingly making will last 6 months without needing to refrigerate the unopened jars. Just before you start making the jam pop a couple plates into the freezer.
Start with the apricot jam (it sets firmer so the jams wont blend), place the pan with all of the ingredients onto the hob, set over medium/low heat and cook, stirring until the sugar has dissolved. Increase the heat to medium/high and bring the jam to a rolling boil and cook for about 10 minutes.
To test if the jam is fully cooked there are a few simple ways you can check. The first is the flake test. Lift the wooden spoon above the pan and allow the jam to drip back into the pan, if some drips, cling to the spoon rather than running off back into the pan you're good. Pop the plate aside for a minute or so before pushing the jam with your finger, if it wrinkles it will set, if it is still liquid cook it for a little longer.
Once the jam has finished cooking turn off the heat and leave for a minute or so to let it settle then stir in the amaretto. If there is any foam on top carefully skim that off and discard (there is nothing wrong with the foam, you could happily stir it back into the jam if you are feeling lazy, but technically the foam is full of air and can make the jam spoil a little quicker. Remove the jars from the oven and carefully divide the jam between the jars, loosely placing the lids on top but not sealing. I like to transfer the jam to a jug to ease this process.
The second jam is strawberry and the reason this needs to be on top is that strawberries are a low pectin fruit so it doesn't set as firmly as other fruits. Because we are using Jam Sugar we don't have to worry about this but it will set less than the apricot. Repeat the cooking process with the strawberries in the same way as the apricot jam. Once it is cooked, carefully pour it on top of the apricot jam and seal immediately.
TOP TIP
Kept in a cool dark place jam will keep for at least six months but once opened needs to be kept in the fridge and consumed within a couple weeks.
Ingredients – 4 items
1
Strawberry jam

Strawberries
Quartered
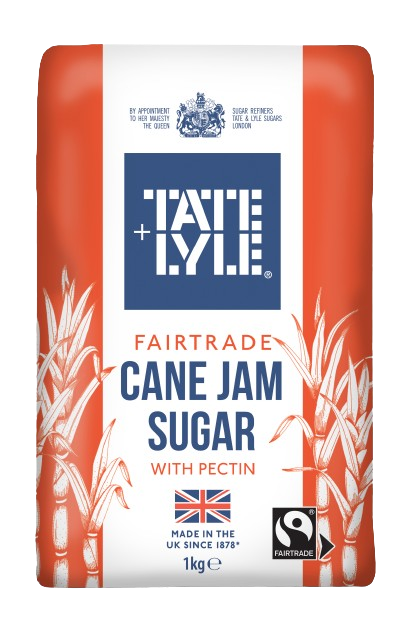
Jam Sugar

Lemon

Vanilla bean paste
Apricot jam

Apricots
Diced

Jam Sugar

Lemon

Amaretto
Rate this recipe!
Share your thoughts or advice
Good job, now enjoy!
Don't forget to share your creation using our hashtags in the chance to get featured.
These cute Easter cupcakes are great for baking with little ones over the holidays… or whipping up just for you on a slow Sunday afternoon.
We’ve used light muscovado sugar to make the sponge extra moist and fudgy – perfect with buttery chocolate icing and a handful of mini eggs.
Want to give them a try? Find the recipe via link in our bio 🥣
#TateAndLyleSugars #WeLoveBaking #EasterBakes #Baking #MiniEggs #EasterCupCake

Tate & Lyle icing sugar makes the smoothest (and cutest) decoration for these special Easter treats.
Grab those Easter cutters and get the kids involved with the icing and decorating – they’ll love it (results may vary).
Find the recipe via link in our bio.
Happy Easter! 🥚🐰🌷
#TateAndLyleSugars #EasterBakes #WeLoveBaking #Baking #EasterBiscuits

Unrefined Demerara is one of our most versatile sugars. Use it to add crunch to your baking, sweeten drinks or simply sprinkle on your breakfast.
And there’s nothing ‘unrefined’ about it when you see it caramelized on top of a crème brûlée!
#TateAndLyleSugars #BakingTips #SweetSuggestions

Whatever you’re doing this Mother’s Day, make it even better with a generous slice of Victoria sponge and a perfectly brewed cuppa 🍰☕️
This beautiful British classic is a great bake for beginners and we’ve put together an easy-to-follow recipe using our pure Fairtrade cane caster sugar.
Want to give it a try? Find the recipe via link in our bio 🥣
#TateAndLyleSugars #WeLoveBaking #Baking #MothersDayBaking #MothersDayBakes #VictoriaSponge #VictoriaSpongeCake

Cutting back on caffeine doesn’t have to mean cutting your coffee ritual altogether. After all, isn’t that what mornings were made for?
With our Barista Collection coffee syrups, you can switch to decaf and still love your morning mug. Even better, whether you choose caramel, vanilla or hazelnut, each one’s 100% vegan and made with pure, Fairtrade cane sugar ☕️
#TateAndLyleSugars #Coffee #GivingUpForLent

Key initiatives funded by our Fairtrade Premium have included a programme focused on female empowerment by The Progressive Sugarcane Producers Association. This pilot project engaged women across four communities in Belize, providing them with essential skills in financial literacy, economic opportunities, and hands-on training.
These women, including Elsa Perez, learned to manage their sugarcane revenues, explore small business entrepreneurship, and diversify their income sources.
Learn more: https://www.sustainablyrefined.com/case-studies/uplifting-and-empowering-women-with-fairtrade/

Perfect for cosying up on chilly days, our creamy caramel latte is really easy to make, with a splash of our Barista Collection caramel syrup. Here’s how…
120ml Semi-skimmed milk
100ml Freshly brewed coffee
15ml Tate & Lyle caramel coffee syrup
5ml Tate & Lyle demerara sugar (optional)
Heat the milk and syrup in a small pan till frothy.
Turn down the heat, stirring in the coffee (and sugar if you like).
Pour and enjoy.
☕️ Our syrups are all vegan, so if you switch up your milk, your latte can be too.
#TateAndLyleSugars #Coffee #CaramelLatte

Ever wondered which sugar works best in pancakes? We’ve got you. Because this pancake day we’re here to help you pick the perfect sugar… whether you’re whipping up a classic batch or something altogether more indulgent.
Take a look, take your pick and have fun flipping! 🥞
#TateAndLyleSugars #Pancakes #PancakeDay

Stuffed with creamy white chocolate chips, our red velvet cookies bake beautifully, for a deliciously crispy outside and a chewy, gooey middle.
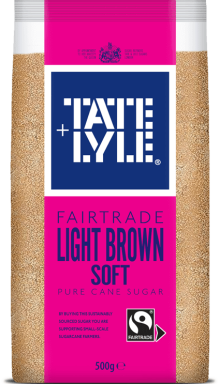
Our light brown soft sugar gives them lots of buttery, caramel flavour, making them the perfect indulgent treat for any day of the week 🍪
Find the full recipe via the link in our bio.
#TateAndLyleSugars #WeLoveBaking #Baking #RedVelvetCookies

We have been refining cane sugar in east London since 1878, and our roots run deep. We want our business and people to continue to thrive - from the raw sugarcane through our whole supply chain – and aim to become the most ethical and sustainable cane sugar refiner in the world.
Learn more: https://www.sustainablyrefined.com/.

The perfect Valentine’s cocktail? It’s got to be a smooth, creamy hazelnut espresso martini – and just for you, we’ve put together our best recipe.
We’ve chosen slow-roasted Mayan Gold coffee from @cafedirect because its caramel flavours pair perfectly with our Barista Collection hazelnut syrup.
Just pour everything over ice in a cocktail shaker, shake it up and strain into a chilled coupe glass. Finish with a few whole roasted coffee beans. Happy Valentine’s ❤️
45ml Vodka
30ml Hot Cafédirect Mayan Gold coffee
15ml Espresso coffee liqueur
7.5ml Hazelnut liqueur
7.5ml Tate & Lyle hazelnut syrup
Get your Tate & Lyle hazelnut syrup at the link in @tateandlylesugars’ bio.
Please drink responsibly.
#TateAndLyle #CafeDirect #Coffee #EspressoMartini #ValentinesDay

*CLOSED*
Like to take your morning coffee to a whole new level? We’ve teamed up with @cafedirect to give you the chance to win our ultimate barista bundle…
☕️ A beautiful Sage Barista Express bean-to-cup coffee machine
🇲🇽 12 packs of Cafédirect’s smooth, slow-roasted Mayan Gold coffee and a Cafédirect V60 coffee dripper
💛 3 Tate & Lyle Barista Collection syrups – vanilla, caramel & hazelnut
Here`s how to enter:
1) Follow @tateandlylesugars and @cafedirect
2) Like this post
3) Tell us in the comments your favourite coffee and syrup combo
✨ Good luck! ✨
Competition ends at 23:59 on 14th February 2025. Must be a UK resident and 18+ to enter. Entries can be made by the Instagram or Facebook post. One winner will be randomly selected by @tateandlylesugars. The winner will be contacted directly by @tateandlylesugars to arrange delivery of the prizes. Prizes may take 30 days to arrive. Prizes cannot be changed. This offer is in no way sponsored, endorsed, administered or associated with Meta. Failure by the winner to accept the prize within 5 days will result in another winner being chosen. Please do not reply to any other account regarding this competition apart from @tateandlylesugars and @cafedirect. Please click the link in our bio for the full list of T&Cs.
#TateAndLyle #CafeDirect #Coffee #SageAppliances

Our Products
View all products
